Demat Account is the gateway of entering into the trading world. Through this, clients can easily store their securities in electronic format. To avail this process, SMIFS has brought hassle-free, paperless e-KYC process for opening a Demat Account right at your fingertips.
With this, you can open your Demat account with your laptop, PC or smartphone. Anywhere, Anytime.
Visit www.smifs.com and click on ‘OPEN AN ACCOUNT’ (https://ekyc.smwml.com/index.aspx)

You will then be redirected to the client registration page which is the first step to opening a Demat account.
Kindly keep the below documents ready with you:
- PAN Card
- Aadhaar Card
- 10-digit Mobile number that is linked with the Aadhaar Card
- Bank Details
- Latest Photograph
- Scanned signature
Please ensure that you have desktop/laptop with camera enabled before starting the process.
STEP 1: CLIENT REGISTRATION
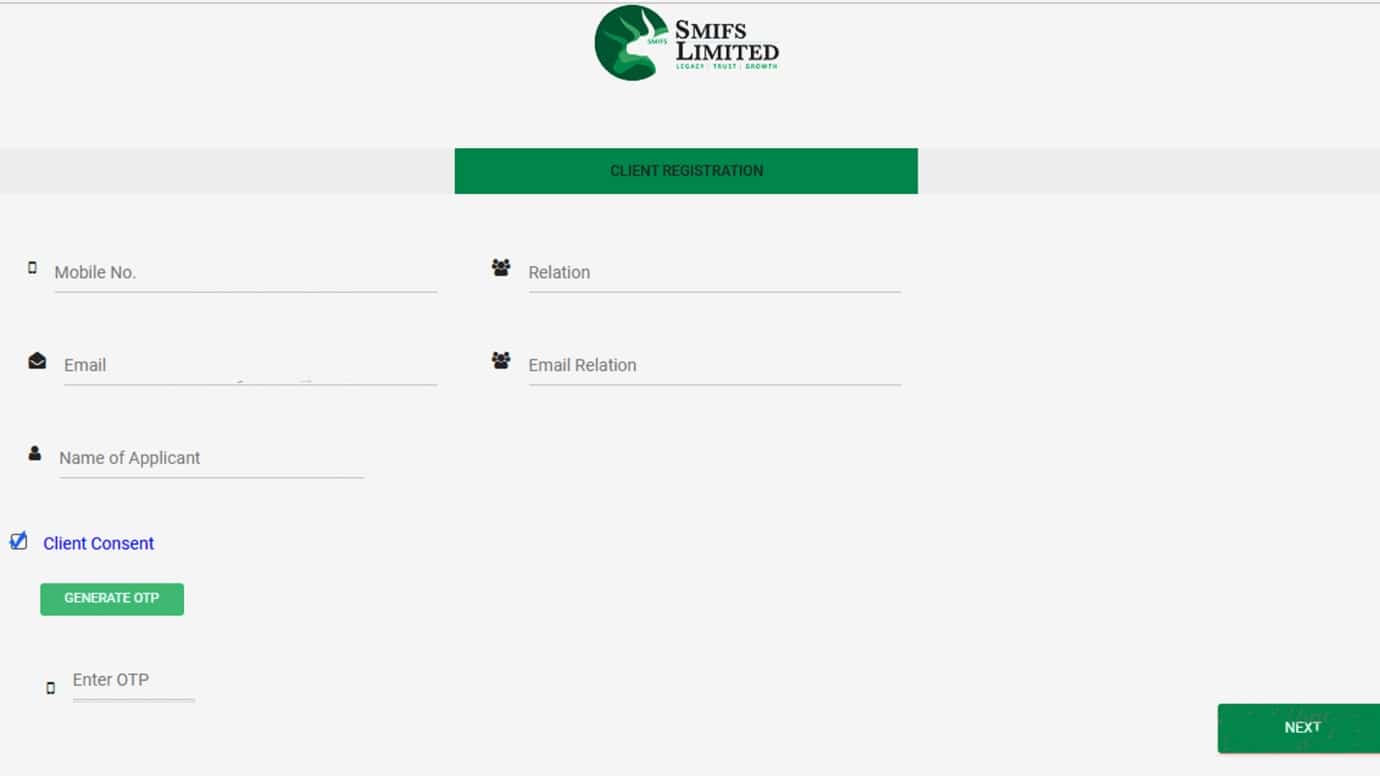
- Insert your 10-digit mobile number that is linked with your Aadhaar card.
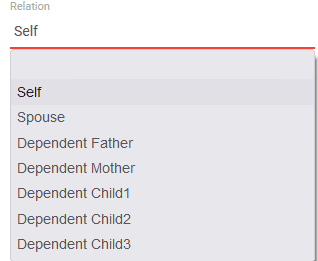
- Enter Relation.
- From the dropdown, select ‘Self’ if you are creating the account for self-use.
- In case of others, select the appropriate option.
- Enter your Email ID that is connected with the given mobile number.
- From the dropdown menu, select the ‘Email Relation’ option which you had selected in the ‘Relation’ column.
- Enter name of applicant.
- Click on the client consent to generate OTP.
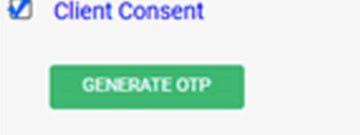
- Click on ‘Generate OTP’.
- A 6-digit OTP will be sent to you.
- The first 3 digits will be sent on your given mobile number and the last 3 digits will be sent on your given Email ID.
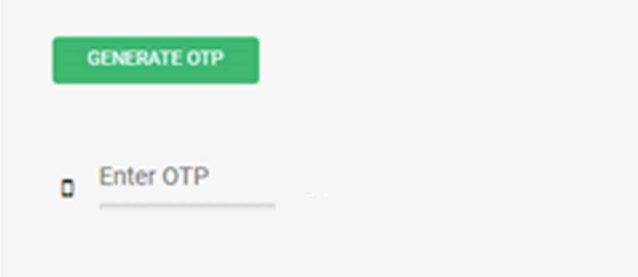
- ENTER OTP.
- Press ‘NEXT’ to continue.
NOTE: Do not fill in separate details for the same person
STEP 2: PAN DETAILS
- Before you start entering the details, a pop up will come on your screen regarding the documents that will be required for completing the e-KYC process.


- Next, enter your PAN number. Once verified, NSDL will confirm you.

- Enter your date of birth.
- Select the source for opening your account. Choose Digilocker for easy accessing of files.
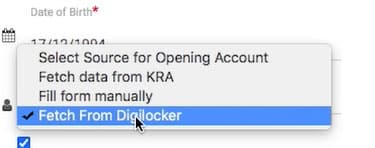
- Click on the box to authorize SMIFS to use your given documents for e-KYC form.

- Enter the last four digits of your Aadhaar card.

- Click ‘Fetch from Digilocker’.

- Enter your Mobile number or Aadhaar number. If you have an existing Digilocker account, you can also put your username.
- Click on ‘Sign in with OTP’.
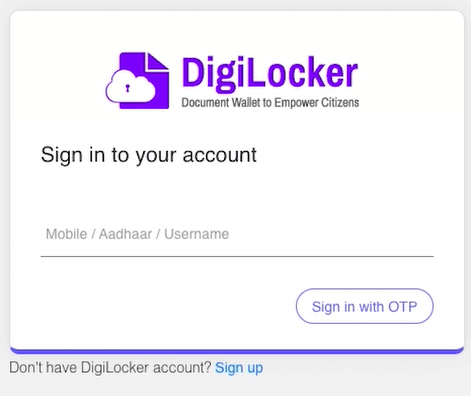
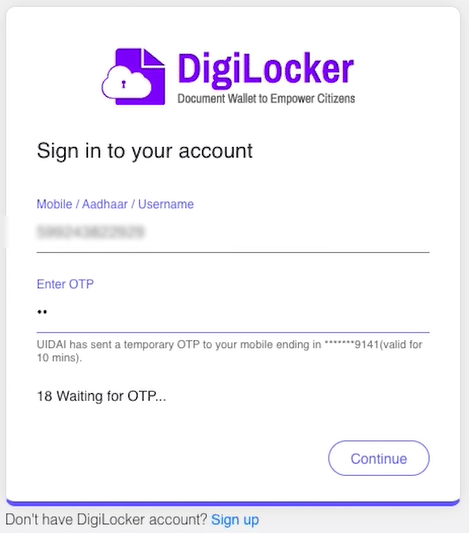
- Once you have received the 6-digit OTP, enter it. Press continue.
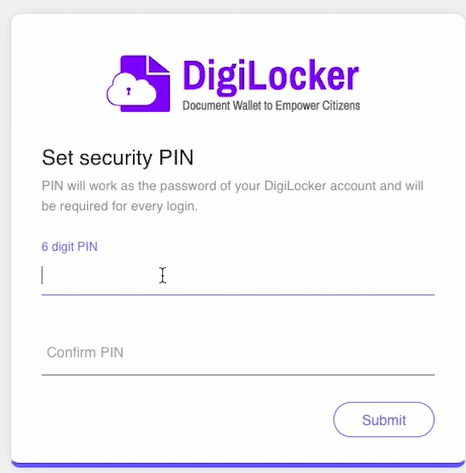
- Enter your pin that will work as your password for Digilocker, re-type the pin and press ‘SUBMIT’.
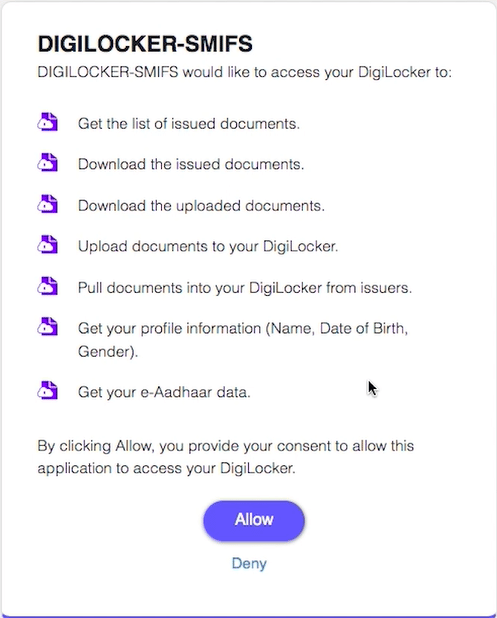
- DIGILOCKER-SMIFS will ask you for access to use your documents.
- Press ‘Allow’ to continue.
- A pop-up will come showing your Aadhaar details including gender, email-id, etc.
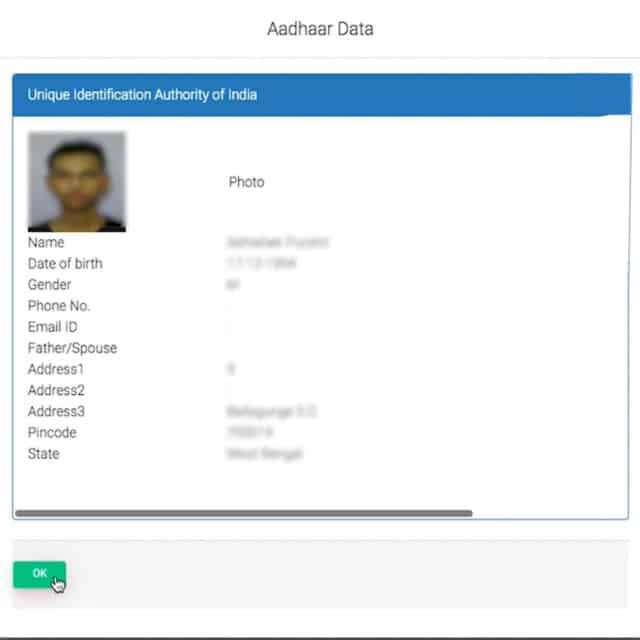
- Press ‘OK’ to continue.
- On the ‘PAN Details’ page, press ‘NEXT’.
STEP 3: PERSONAL DETAILS
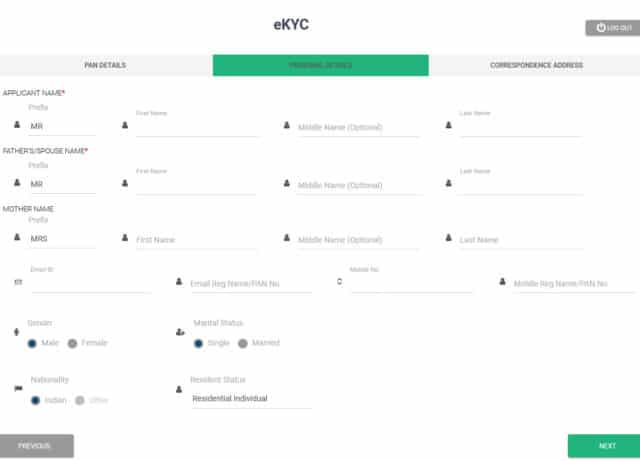
- Enter your personal details (Fields with ‘*’ are mandatory to fill)
- Enter your contact details and other fields like Gender, Marital Status and Nationality.
- For Residential Status, select ‘Resident Individual’.
- Click on ‘NEXT’.
STEP 4: CORRESSPONDENCE ADDRESS

- Enter your address details. (Fields with ‘*’ are mandatory to fill)
- Select address type as per preference.
- Enter contact details.
- Select ‘Yes’ if your correspondence address is same as permanent address. Else select ‘NO’.
- Press ‘Next’.
STEP 5: PERMANENT ADDRESS
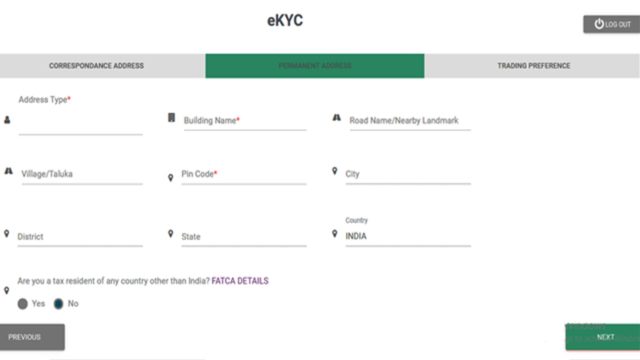
- If your correspondence address is not same as permanent address, fill in your permanent address details.
- Click ‘NEXT’.
Select:
- ‘No’ if you are a tax resident of India
- ‘Yes’ if you are a tax resident of any country other than India
- Click ‘NEXT’.
STEP 6: TRADING PREFERENCES
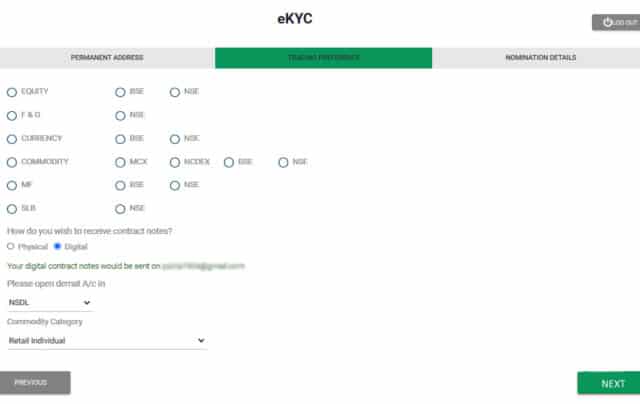
- Select the trading preference & exchange as per your choice.
- Keep ‘Digital’ as the preferred mode of receiving contract notes. (will be sent on your Email ID)
- Select your preferred Depository from the dropdown
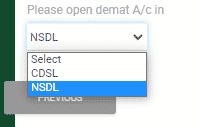
- Click ‘NEXT’.
STEP 7: NOMINATION DETAILS
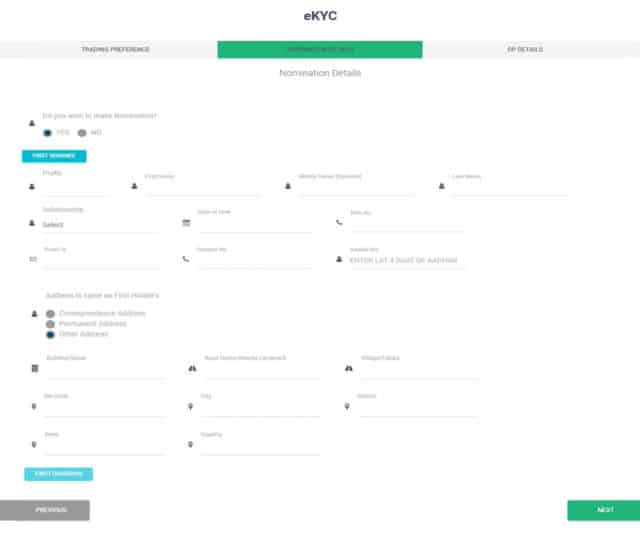
- Fill in your nomination details.
- Click ‘YES’ if you want to make a nomination or else click ‘NO’. If you select ‘YES’, a set of columns will appear before you, asking you to fill in the details of your nominee.
- Fill in your address details and contact details.
- Click ‘NEXT’.
- After this, a pop-up will come on the top of the screen asking if you want to add more nominee. Select ‘YES’ or ‘NO’ as per your preference.

- It will show you the nominee names and percentage of shares they hold. Click ‘NEXT’ to go to the next step.
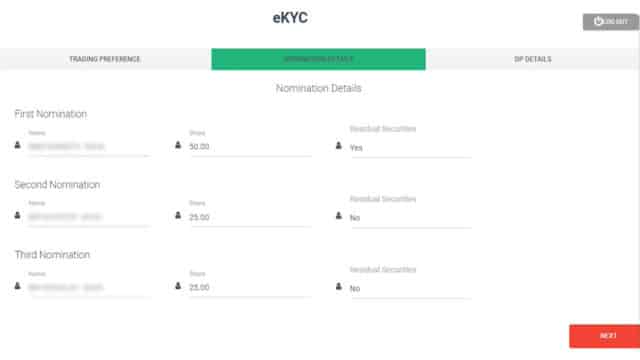
- Click ‘NEXT’.
STEP 8: DP DETAILS
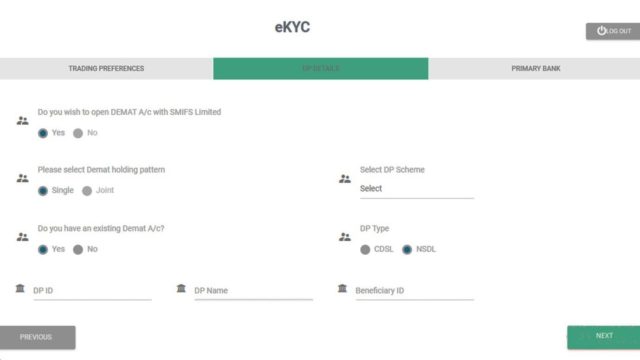
- Enter the DP details
- Select ‘Yes’ if you have an existing Demat Account or else ‘NO’.
- Enter your DP ID, DP name and Beneficiary ID if you have an existing account.
- Select ‘Investor’ for your DP (Depository Participant) scheme and choose your type. As soon as you select the DP scheme, a PDF will open regarding the details of your plan.

-
- Press ‘NEXT’.
NOTE: Since both DEMAT and Trading account are created together, you will not be allowed to open a DEMAT account individually.
STEP 9: VOLUNTARY DECLARATION
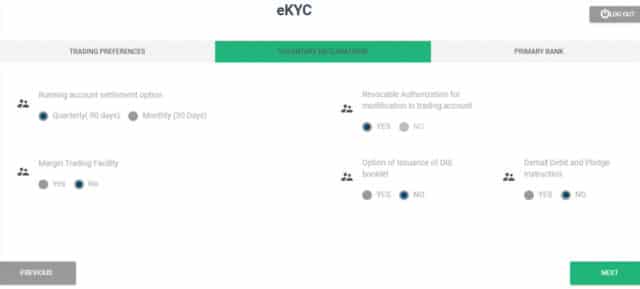
- Choose your account settlement.
- Choose ‘YES’ for the services you want to avail or else ‘NO’.
- The option for ‘Revocable Authorization for Modification in Trading Account’ is selected ‘YES’ by default.
- The “Demat Debit and Pledge option is selected “No” by default and locked. The “Yes” option will be enabled on 1st. September as per SEBI circular.
- Click ‘NEXT’.
STEP 10: TERMS AND POLICIES
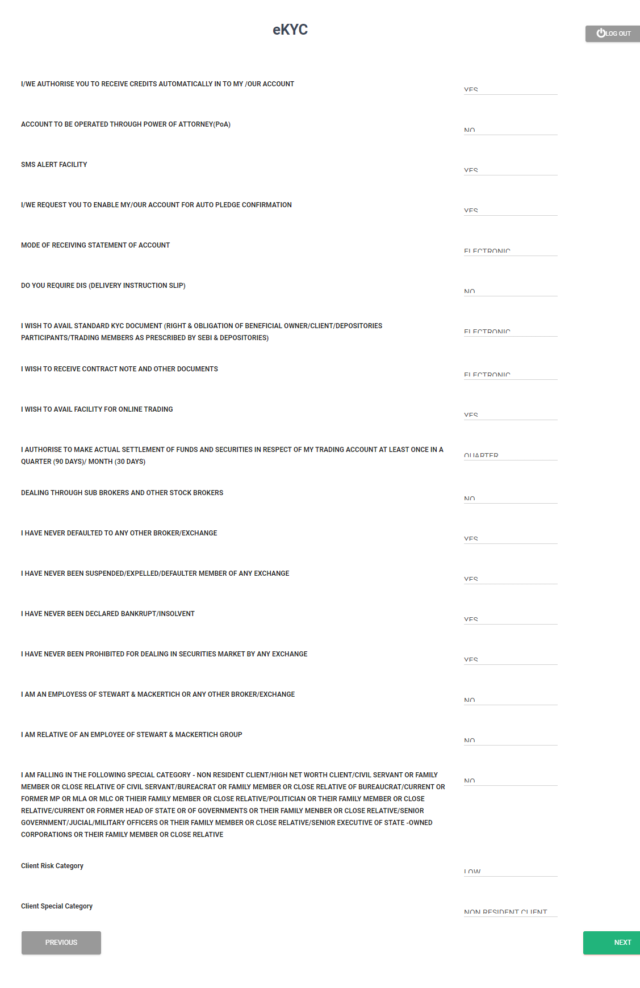
- Go through all the terms and policies once.
- Click ‘NONE OF THE ABOVE’ for Client Special Category.
- Press ‘NEXT’ to continue.
STEP 11: PRIMARY BANK

- Fill in your primary bank details which you would like to link with your Demat account.
- Select:
- ‘YES’ if you want to provide additional details
- ‘NO’ if you do not want to provide additional details
- Press ‘NEXT’ to continue
STEP 12: ADDITIONAL BANK

- Enter your additional bank details, if any.
- Press ‘NEXT’ to continue
STEP 13: REGULATORY DISCLOSURE

Fields with ‘*’ are mandatory to fill.
- Select your occupation details and select your annual income from the dropdown.
- Fill in your trading experience and the PEP (Politically Exposed Person) status.
- Enter details of the introducer if you have any.
- Select:
- ‘YES’ if you have any pending action
- ‘NO’ if you don’t have any pending action
- Select I accept Terms and Condition.
- Press ‘NEXT’ to continue.
STEP 14: UPLOAD DOCUMENTS
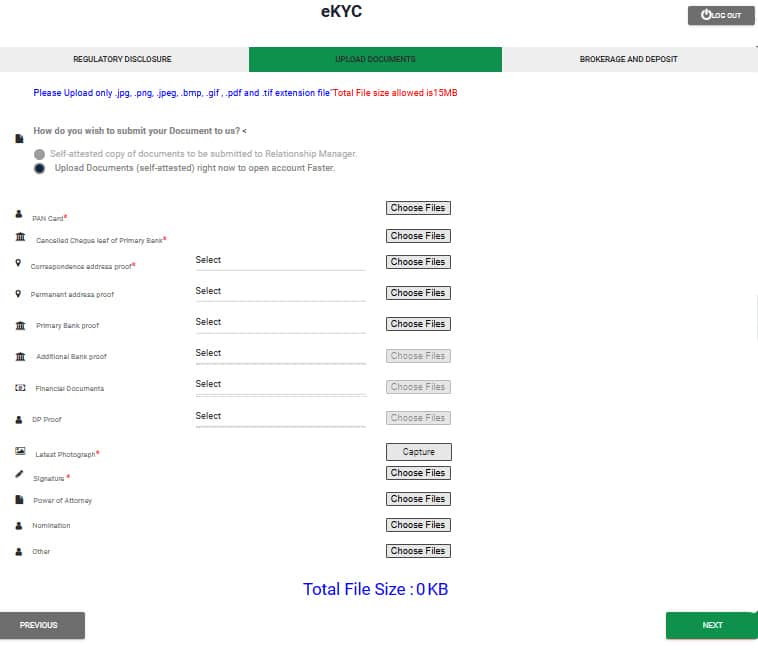
- For this step, you will need the following documents:
- Pan Card
- Cancelled cheque of primary bank
- Correspondence address proof
- Latest photograph
- Signature
- NOTE: All documents should be within 15MB
- Fields with ‘*’ are mandatory to fill.
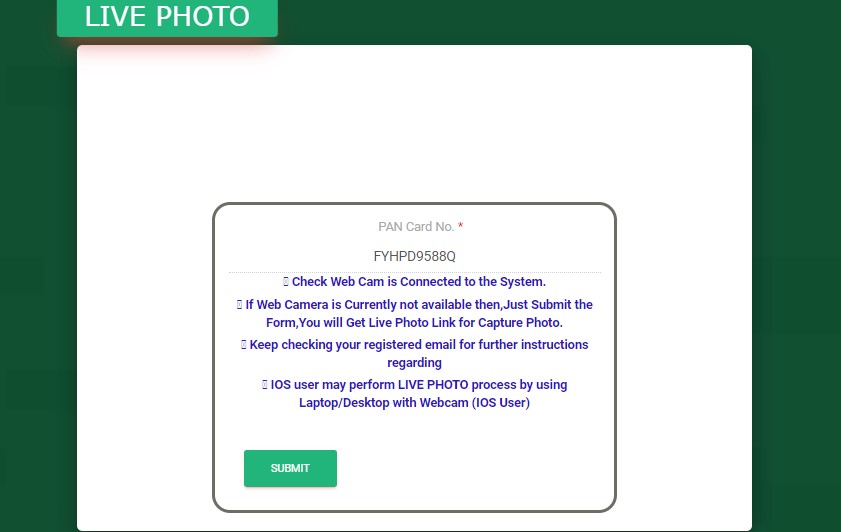
- For the latest photograph column, SMIFS is going to capture your live picture. If you are accessing it through your laptop, it will ask for permission to use your live cam. In case you are using your mobile, a link will be sent to your registered mobile number and email id to capture your picture.
- You will have to use jpg, .png, .jpeg, .bmp, .gif , .pdf and .tif extension file for the uploading your documents.
STEP 15: BROKERAGE AND DEPOSIT

- Select your desired brokerage scheme from the dropdown option.
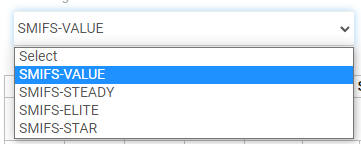
- SMIFS provides you with segments for Intraday, Delivery, Derivatives, currency and commodity for you to go through. You may choose the segment as per your convenience. You can also download the chart for later use.
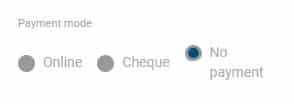
- Choose your mode of payment from the given options.
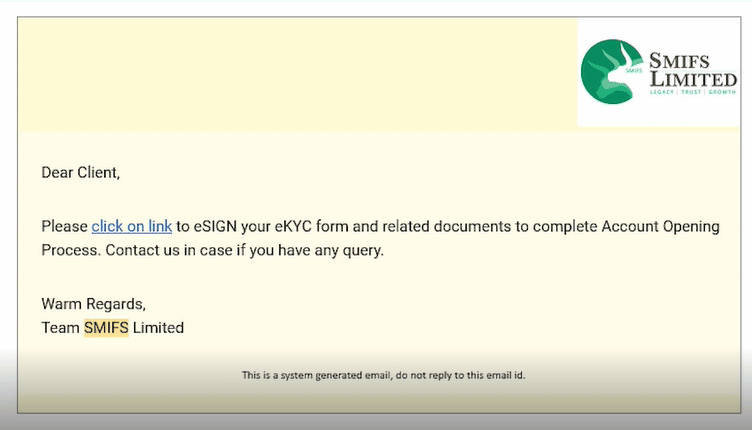
Once done, your page will show a successful note. SMIFS from their side will approve the client’s request. Then, a new set of steps shall be followed to complete the process. After the admin’s approval, you will have to log into the account once again. This time, the page will open with a new option ‘E-sign’.
STEP 16: E-SIGNING
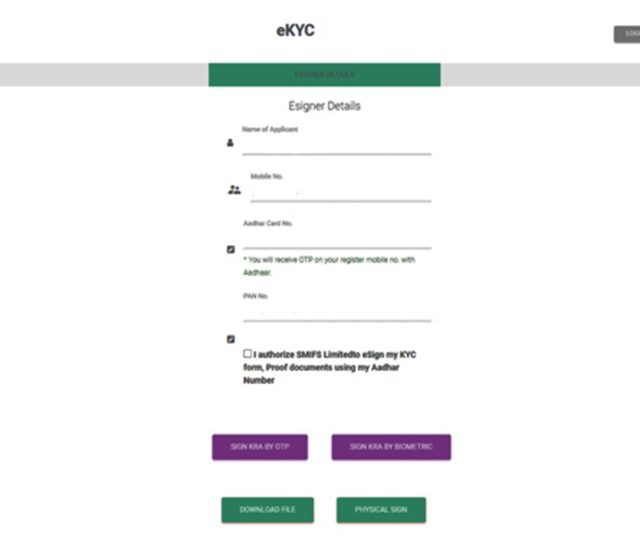
- Click on the box to authorize SMIFS LIMITED to eSign your documents
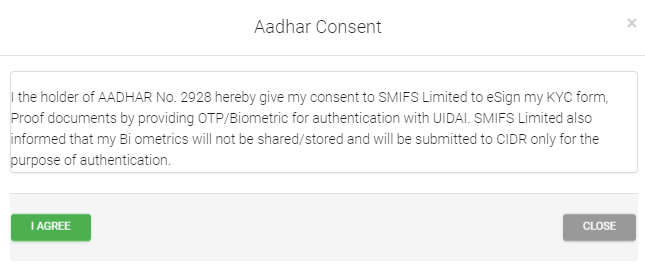
- Once you click on it, you will receive an Aadhaar consent.
- Click on ‘I Agree’ to continue.
- Click on ‘Sign KRA by OTP’ .
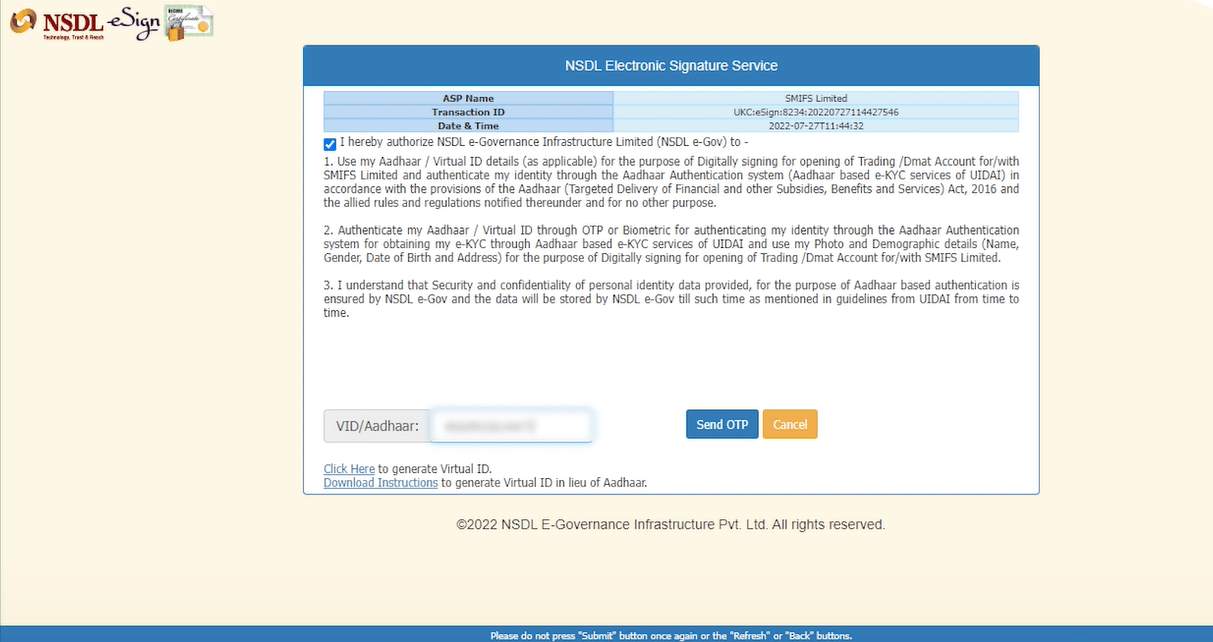
- You will then be redirected to NSDL e-sign page.
- Click on the box and enter your VID/Aadhaar number. Click on ‘Send OTP’.
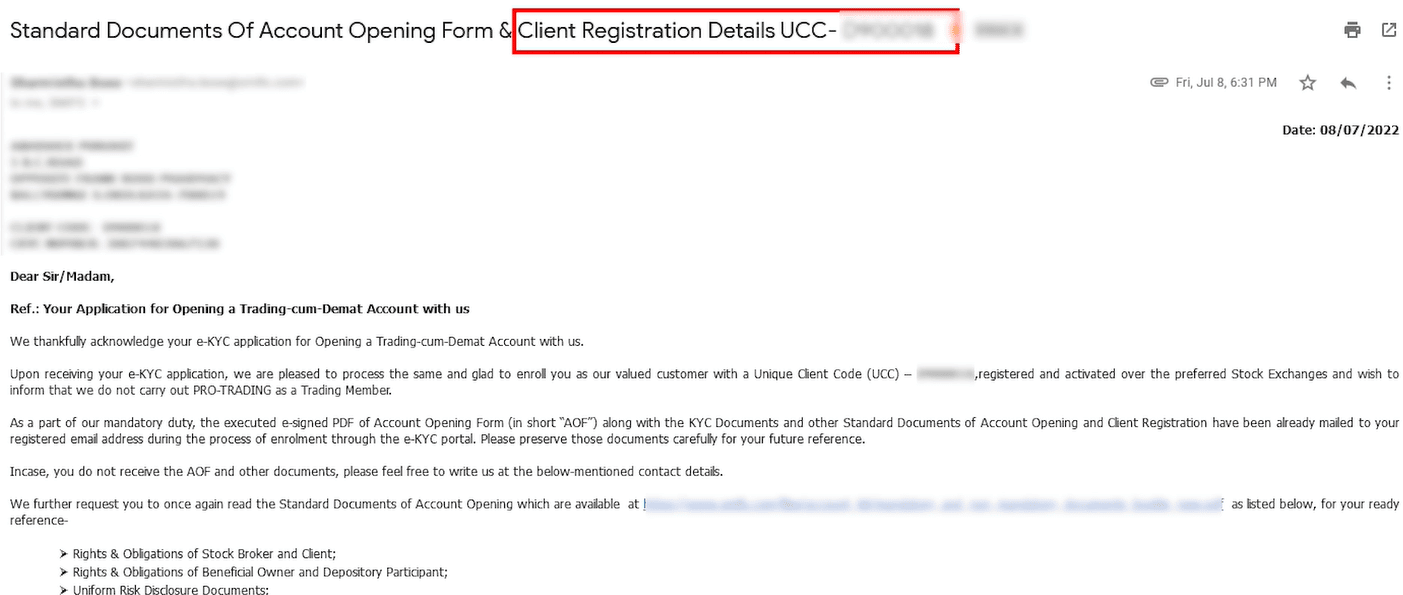
- You are All set!
SMIFS is going to send you your UCC (Unique Client code) through which you can log in to our SMIFS ELITE app or the website and access your Demat account and Trading Account. Later, you can also change your password as per preference.
In case of any queries, feel free to Call or WhatsApp at 9830121215


